
September 13, 2026
Custom Part-Holding Trolleys: A Design Guide for Line-Side Handling
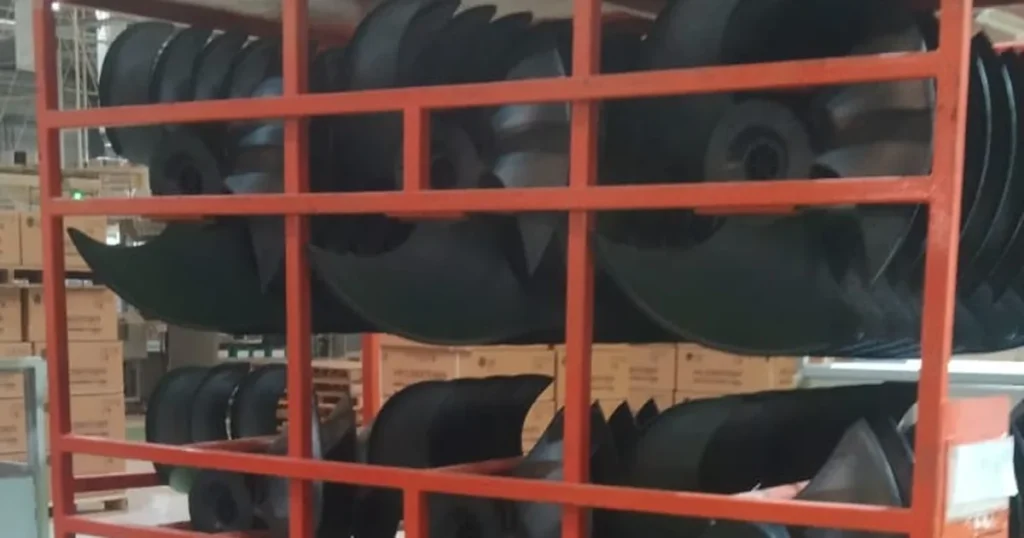
A custom part-holding trolley is designed around the part it carries, not around a catalogue photo. The part envelope, the number of pieces moved per trip, the surfaces that must not be scratched, and the route between workstations decide the rack layout, frame size, caster choice and finish. When those inputs are right, the trolley becomes a line-side fixture that speeds up loading, protects the part and keeps the count correct. When they are wrong, operators quietly go back to stacking parts on the floor.
This guide is written for buyers and production engineers specifying a dedicated trolley for formed, machined or moulded parts. It follows the same order we use when reviewing a real enquiry, and it ends with the checklist we need in order to quote.
Quick answer: six inputs decide the design
| Input | What it decides |
|---|---|
| Part envelope and weight | Rack pitch, shelf size, tube section, pin or slot spacing |
| Pieces per trip | Number of levels, overall height, footprint and load per level |
| Part surface and contact points | Protective sleeves, padding, edge protection, compartment lining |
| Route and floor | Wheel material and diameter, caster rating, brakes, handle position |
| Environment | Powder coating, galvanizing, 304 or 316 stainless steel |
| Line discipline | Labels, kanban slots, sequencing, nesting for return transport |
When a dedicated part trolley is worth building
A flat platform trolley is usually the cheaper answer when goods are boxed, bagged or simply stacked. A dedicated rack or pin trolley starts to pay for itself when one or more of these is true:
- Parts are large, awkward or unstable when laid flat on a deck.
- Surfaces are visible or coated, so parts must not touch each other or the frame.
- The same route runs many times per shift, so a few seconds saved per trip compounds.
- The count per trip is fixed by the process, for example pieces per mould change or per pallet transfer.
- The trolley doubles as a line-side stand, so parts must be presented at working height.
Step 1: measure the part, not the trolley
Most rack problems come from a frame that was drawn around a photograph instead of around the part. Collect these numbers before anything is sketched:
- Envelope — length, width and height at the widest point, including any flange, stud or spigot that can snag a neighbour.
- Weight per piece and, where it matters, the centre of gravity.
- Quantity per trip — often fixed by the process rather than chosen freely.
- Finish condition — painted, plated, anodised, polished or coated faces that must stay unmarked.
- Loading temperature — parts taken hot from a press or oven need rack materials that tolerate heat and clearance for thermal movement.
- Contact points — where the part may and may not be touched.
| Situation | Design response |
|---|---|
| Part is thin or flexible | Support it along its length, not at two points; add cross members so it cannot bow |
| Part has a boss, bore or thread | Use a pin or spigot through the feature as the locating device |
| Part is stacked in layers | Set the pitch from the tallest layer plus handling clearance, not from the average |
| Part is heavy but handled one-handed | Lower the rack, shorten the reach, and keep the load inside the wheelbase |
| Operator loads and unloads from both sides | Make the rack symmetrical so it can be used either way round |
Step 2: choose the rack layout
Five patterns cover most projects. The right one is decided by how the part is gripped and how many pieces are needed per trip.
| Layout | Best for | Watch out for |
|---|---|---|
| Flat shelf with dividers | Boxes, trays, mixed parts | Low build cost; parts can still slide if the divisions are too generous |
| Angled or gravity shelf | Parts presented to the operator | Needs a positive stop so parts cannot roll off |
| Pin or peg rack | Parts with a bore, boss or central hole | Pins must be sleeved or the bore will be marked |
| Vertical slotted rack | Flat or curved panels stored on edge | Slot width and lining decide whether the part is protected |
| Compartment or bin build | Small parts that must stay separated and counted | Cleanability matters if swarf or dust collects in the corners |
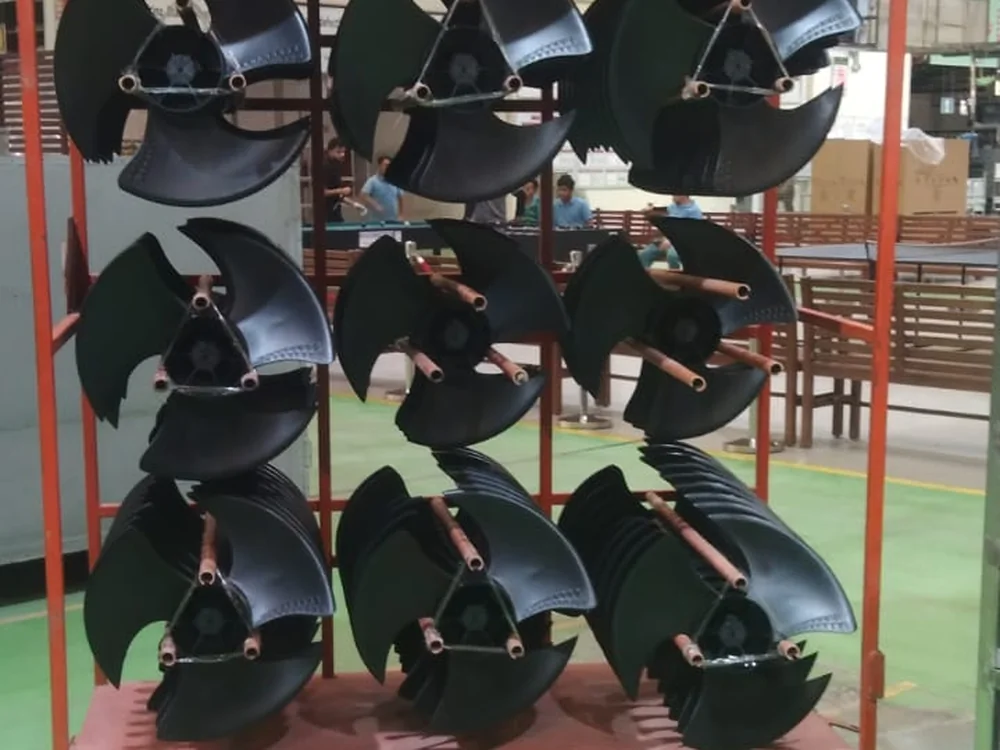
Many projects combine two patterns: a flat shelf for tooling and paperwork, and a pin rack for the parts themselves. That is exactly what the rack below does — the frame is a simple welded rectangle, and all the locating work is done by sleeves on the pins rather than by complex sheet metal. The result is cheap to repeat, easy to repair, and the operator cannot load a piece in the wrong orientation.
Step 3: set the load numbers before the layout is frozen
- Pieces per trip = pieces per level × number of levels.
- Payload = pieces per trip × weight per piece, plus bins, dunnage and tooling.
- Design load = payload + trolley self-weight. Chosen casters should then carry roughly two to three times the static load per wheel, because manual pushing on an uneven floor multiplies the real load on one corner.
- Stability — a tall rack on a narrow base will tip under a side push or a corner clip. Widen the base, lower the centre of gravity, or fit a fixed wheel pair so the trolley tracks straight instead of wandering.
Write these numbers on the drawing. They are the assumptions a supplier has to be able to see, and they are the first thing a careful supplier will question before quoting.
Step 4: frame, material and finish
| Build | Typical use | Trade-off |
|---|---|---|
| Mild steel tube + powder coating | General indoor racks, workshops, assembly lines | Cheapest to repeat, repairable, any colour; chips at impact points |
| Hot-dip or pre-galvanised steel | Outdoor use, damp stores, rough floors | Corrosion protection without paint; dull finish, harder to colour-match |
| Stainless steel 304 | Food handling, washdown, humid processing rooms | Resists general corrosion and cleaning chemicals; more expensive |
| Stainless steel 316 | Salty, chlorinated or chemical environments | Best corrosion resistance; only worth it where 304 is attacked |
For most indoor racks a welded mild steel tube frame with powder coating is the sensible default: the colour can match a plant standard, the surface hides fingerprints better than bare steel, and a damaged section can be cut out and re-welded. Move to a different material only when the environment demands it. Tube section and wall thickness then follow from the design load and the span between supports — a rack that sags between two posts will unload itself at the wrong moment.
Step 5: casters and floor conditions
Wheels are where a good rack most often becomes a bad trolley. The floor usually decides the wheel, and the wheel decides how hard the operator works.
| Wheel | Best floor | Notes |
|---|---|---|
| Polyurethane (PU) | Smooth epoxy or tiled floors, quiet running | Good rolling and low noise; can mark soft floors under heavy load |
| Nylon | Concrete, higher loads, low speed | Very durable; noisy and harsh on joints and grating |
| Rubber | Mixed surfaces, vibration | Gentle on floors and loads; higher rolling resistance |
| Pneumatic | Uneven ground, outdoor, debris and joints | Absorbs shock and climbs obstacles; needs air pressure checks |
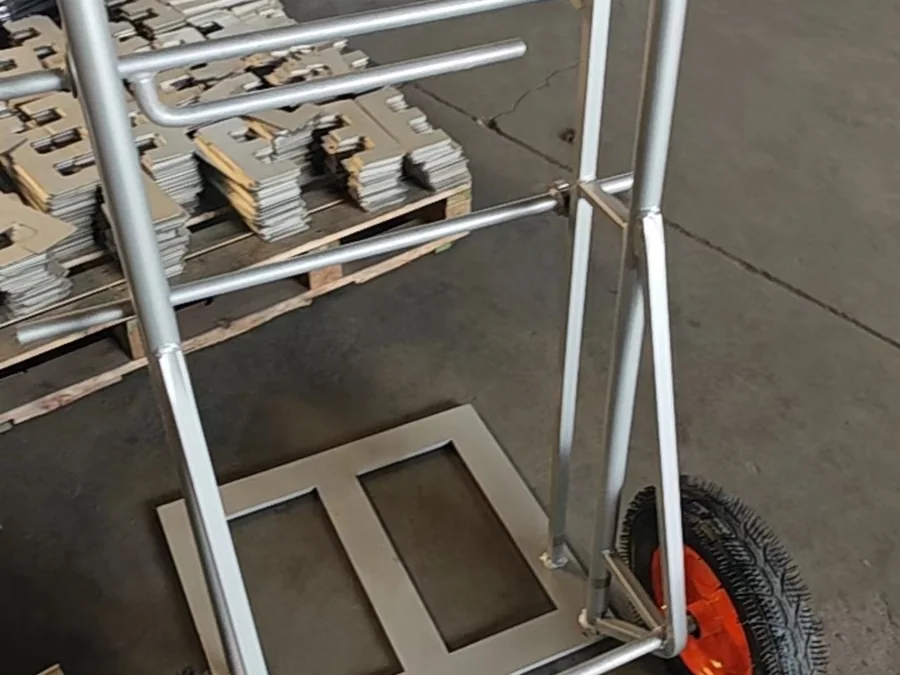
Fit the swivel casters where you need manoeuvrability and the fixed pair where you need tracking, fit a brake on at least two wheels for slope work, and keep the castor offset matched to the wheel diameter so the trolley starts moving without a fight. For a deeper comparison of wheel materials, see caster selection for industrial trolleys.
Step 6: protect the part and the operator
- Sleeve every locating pin. A plastic or rubber sleeve costs very little and is the difference between a bore that is still on tolerance and one that has to be reworked.
- Pad the contact faces where parts rest on steel, with adhesive rubber, PU strip or sacrificial plastic.
- Deburr and radius edges along any route a hand or a finished surface will travel.
- Handle at 900–1000 mm for a standing operator, and keep the loaded centre of gravity inside the wheelbase so the push force stays comfortable rather than marginal.
- Consider electrostatic discharge if the parts are sensitive; specify conductive wheels and grounding where needed.
- Keep it cleanable if the trolley enters a washdown or food area — avoid pockets that trap water and swarf, and choose a finish that survives the cleaning chemicals.
Step 7: plan packing, spares and repeat orders
A part trolley is usually bought in a batch and then reordered as the line grows, so design it to be repeatable. Keep the drawing, the rack pitch and the caster part numbers on file, because the second order is the one that has to match the first exactly. If trolleys are shipped back empty, make them stack or nest so the return leg is not wasted volume.
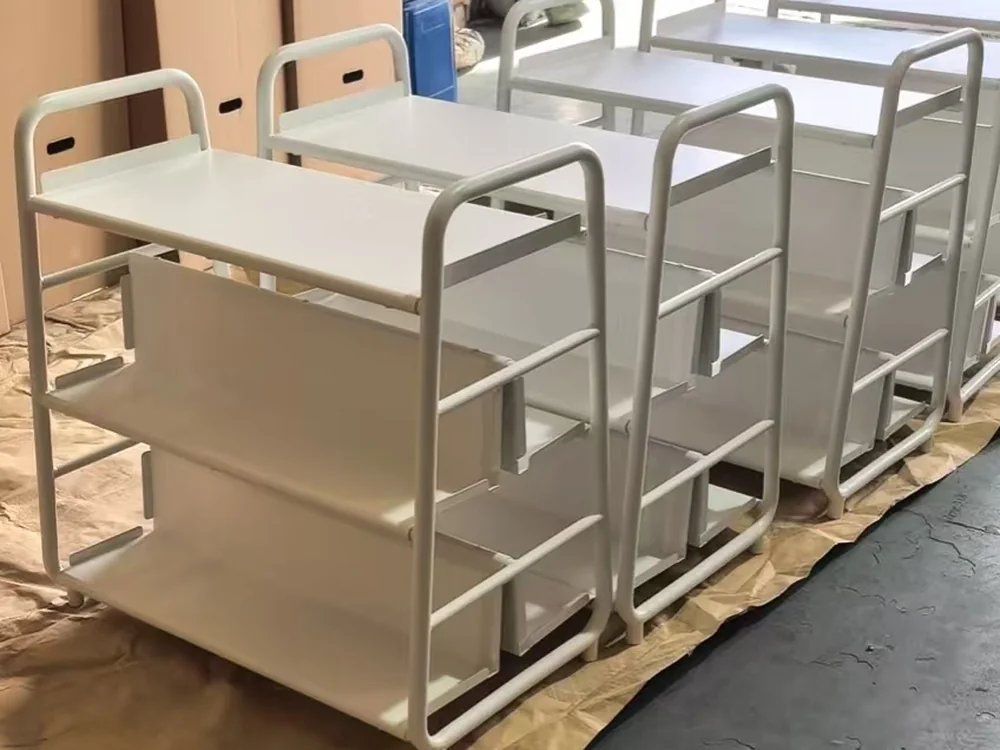
For export, agree the packing method early, since a rack with exposed pins needs more protection than a flat deck. Details of our bending, welding and finishing steps are on the manufacturing processes page, and how we check and pack before dispatch is covered under quality control.
RFQ checklist for a part-holding trolley
- Part drawing or a clear photo with dimensions, plus the part weight.
- Pieces required per trolley or per trip.
- Which surfaces or features must not be touched or marked.
- Part temperature at loading, and how the part is handled today.
- Route and floor: surface, joints, slopes, door widths and turning circles.
- Manual push, towed, or interfaced with a conveyor or AGV.
- Environment and cleaning regime, to fix the finish.
- Handle height and loading ergonomics agreed with the operators who will use it.
- Labelling, kanban or sequencing requirements.
- Stacking or nesting for empty return transport.
- Quantity, colour, logo or asset-number marking, packing method and destination country.
- Any existing trolley that works well, and any that does not — that comparison is often the fastest brief.
Frequently asked questions
What is a part-holding trolley?
A part-holding trolley is a wheeled frame with a rack, pin, slot or compartment structure that holds specific parts in fixed positions rather than carrying loose goods on a flat deck. Its purpose is to protect the part, present it at working height and keep the count per trip predictable.
How many parts should one trolley carry?
Start from the process, not from the frame. If parts are produced or consumed in a fixed batch — twelve per mould change, twenty-four per pallet — the trolley should move exactly that batch or a simple multiple of it. Rounding up just to fill the rack creates heavy, unstable loads that no one wants to push.
Is a custom rack trolley more expensive than a standard one?
The frame is rarely the expensive part. Cost comes from complexity: the number of different components, the welding and fixture work, the finish, and the batch size. A rack built from standard tube with standard casters and simple pins is usually much closer to a catalogue trolley than buyers expect.
Can a trolley be built around our part drawing or CAD file?
Yes. A part drawing or CAD model is the most useful thing you can send, because the rack geometry can be derived from the part rather than guessed. Photos with a tape measure across the part are a workable substitute when drawings are not available.
Mild steel or stainless steel for a part trolley?
Mild steel with powder coating is sufficient for dry indoor use and is the easiest to repair. Stainless steel 304 is the usual choice where the trolley is washed down or sits in a humid processing room, and 316 is reserved for salty or chemical environments.
Have a similar project? Send the part.
The fastest way to a usable quotation is a photo or drawing of the part with its dimensions, the number of pieces you need to move per trip, and the floor the trolley will run on. From that we can propose a rack layout, a frame and a wheel choice, and confirm what can be standardised to keep the cost down.
Send your part details for review, or start from our industrial trolleys range and the applications we build for. If the project involves custom fabrication rather than a standard family, the custom fabrication overview is the better starting point. You can also compare platform and tool trolleys to see how a dedicated rack differs in practice.
Have a Similar Trolley Project? Send It for Review
Send your trolley type, load capacity, size, wheel requirement, quantity, and drawings or reference photos. Our team will review the structure and reply within 24 hours on business days.
Urgent project? Email gao@doingmetal.com or WhatsApp +86 18158549983.